Almost there...
|
BlogColour spaces are a vastly confusing topic when you are first starting out to colour grade. There are many tutorials out there that tell you what to do and how to do it, but not why! This article highlights my personal understanding on the topic.
Before we get into the details, we must first understand what a Colour space actually is, and why it matters to us! Apple gives a fantastic explanation:
“No image device is capable of capturing and displaying the full spectrum of colours visible to the human eye. Consequently, image devices record, edit, display, or output a subset of those colours. This range of reproducible colour is known as the device’s colour gamut. Additionally, devices capture, process, and display different ratios between the lightest and darkest parts of an image, from pure black to brightest white. This luminance range is known as dynamic range. Together, these attributes define an image’s or device’s colour space.”
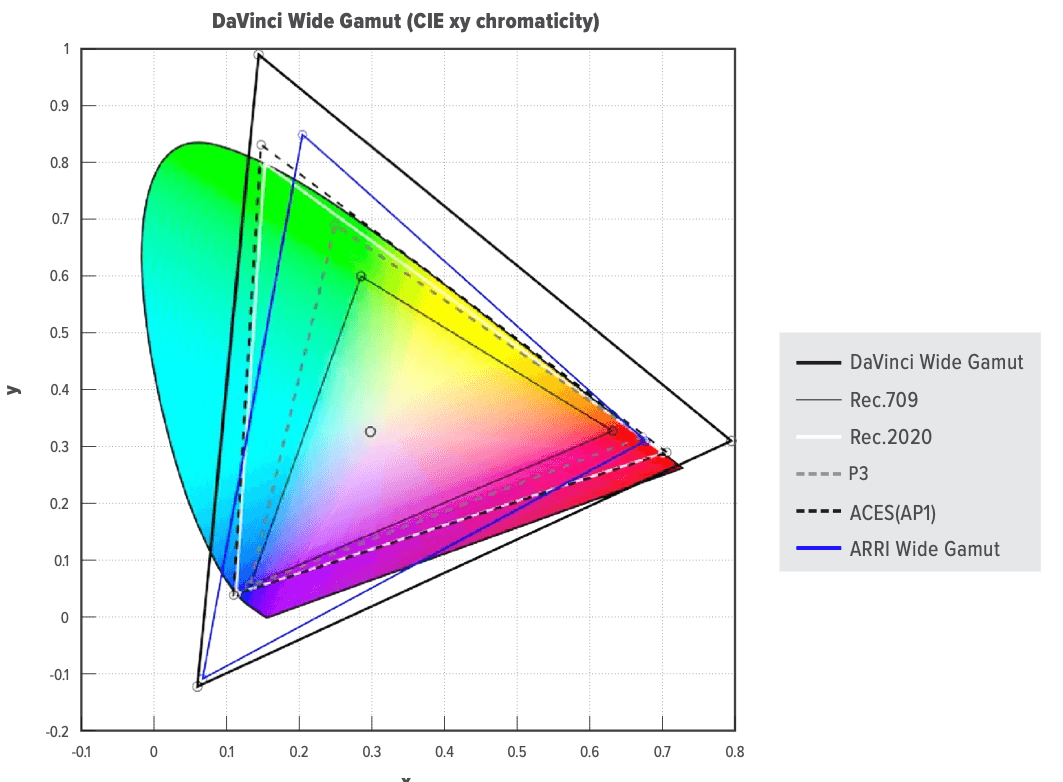
The graph below is a visual representation of a several colour gamuts. Every colour within it's respective triangle is available to use within that gamut. You can see that no gamut can capture every single colour - the closest we get is the DiVinci Wide Gamut. It is also worth pointing out the smallest gamut on the graph - the one with the least amount of colours available - Rec. 709.
Device Colour Space
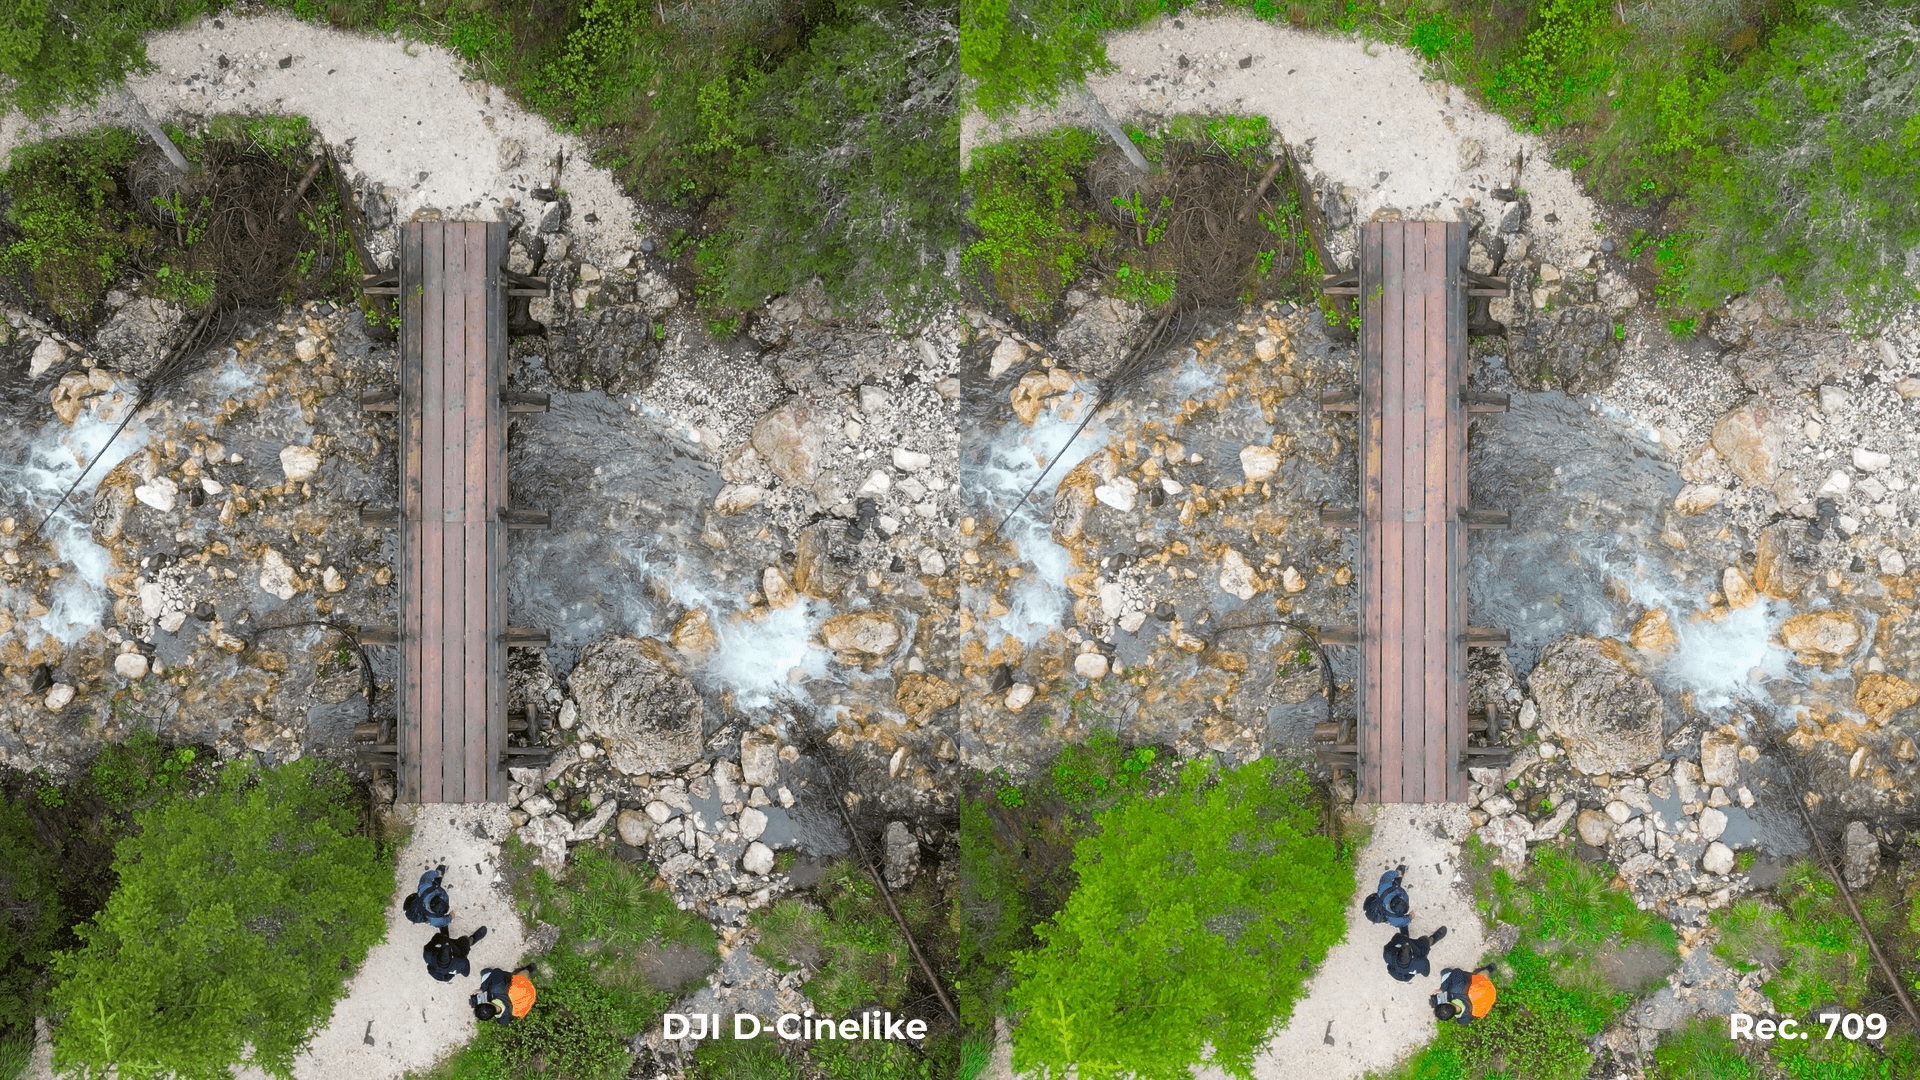
A camera's colour space is determined by its technology. Professional standard cameras give you the ability to shoot in a Log (logarithmic) colour space. These colour spaces are designed to retain the highest dynamic range captured by the camera sensor. Data that may have been filtered out otherwise is stored, and available to use in post production. This larger dynamic range gives the colourist much more to work with, thus allowing them to achieve the desired look more accurately and easily. An example of this is the DJI Mini 3 Pro camera which offers you the choice to film in Normal (Rec. 709 colour space ) or 'D-Cinelike' (DJI's Log-type colour space*). If you knew you were going to colour grade in post processing, you would choose to film in D-Cinelike to capture as much data as possible. This is non-negotiable when filming in a professional context.
We now know what Colour Space our camera shoots in, but what about the colour space that is displayed on our monitors? Traditional displays support a much more limited colour space called Rec. 709. This is a long-standing industry standard, and you can think of this colour space as the language that most displays speak. Your display does not understand the language of a D-Cinelike video. You will notice that a D-Cinelike video looks flat on your monitor. This is because your monitor does not understand the language that your video is speaking. You must first translate into a Rec. 709 colour space - a language that your display does understand. After doing so, you will notice a drastic difference in the two videos (see image below). Your display now understands what language the video is speaking therefore, the proper colours and dynamic range are shown as the camera intended to capture them. It is clear now that Colour Space Transform's are not an artistic preference, but rather a necessity when colour grading.
All this information is great, but it is useless if I just film in Rec. 709 in the first place, right? Yes, and no. If you do not intend to colour grade your footage, simply record in Rec. 709 (your phone camera records in this colour space by default) and you're good to go. However, if you intend to colour grade your video, regardless of the colour space it was shot in, professionals recommend you still use CST's!
The Intermediate Gamut
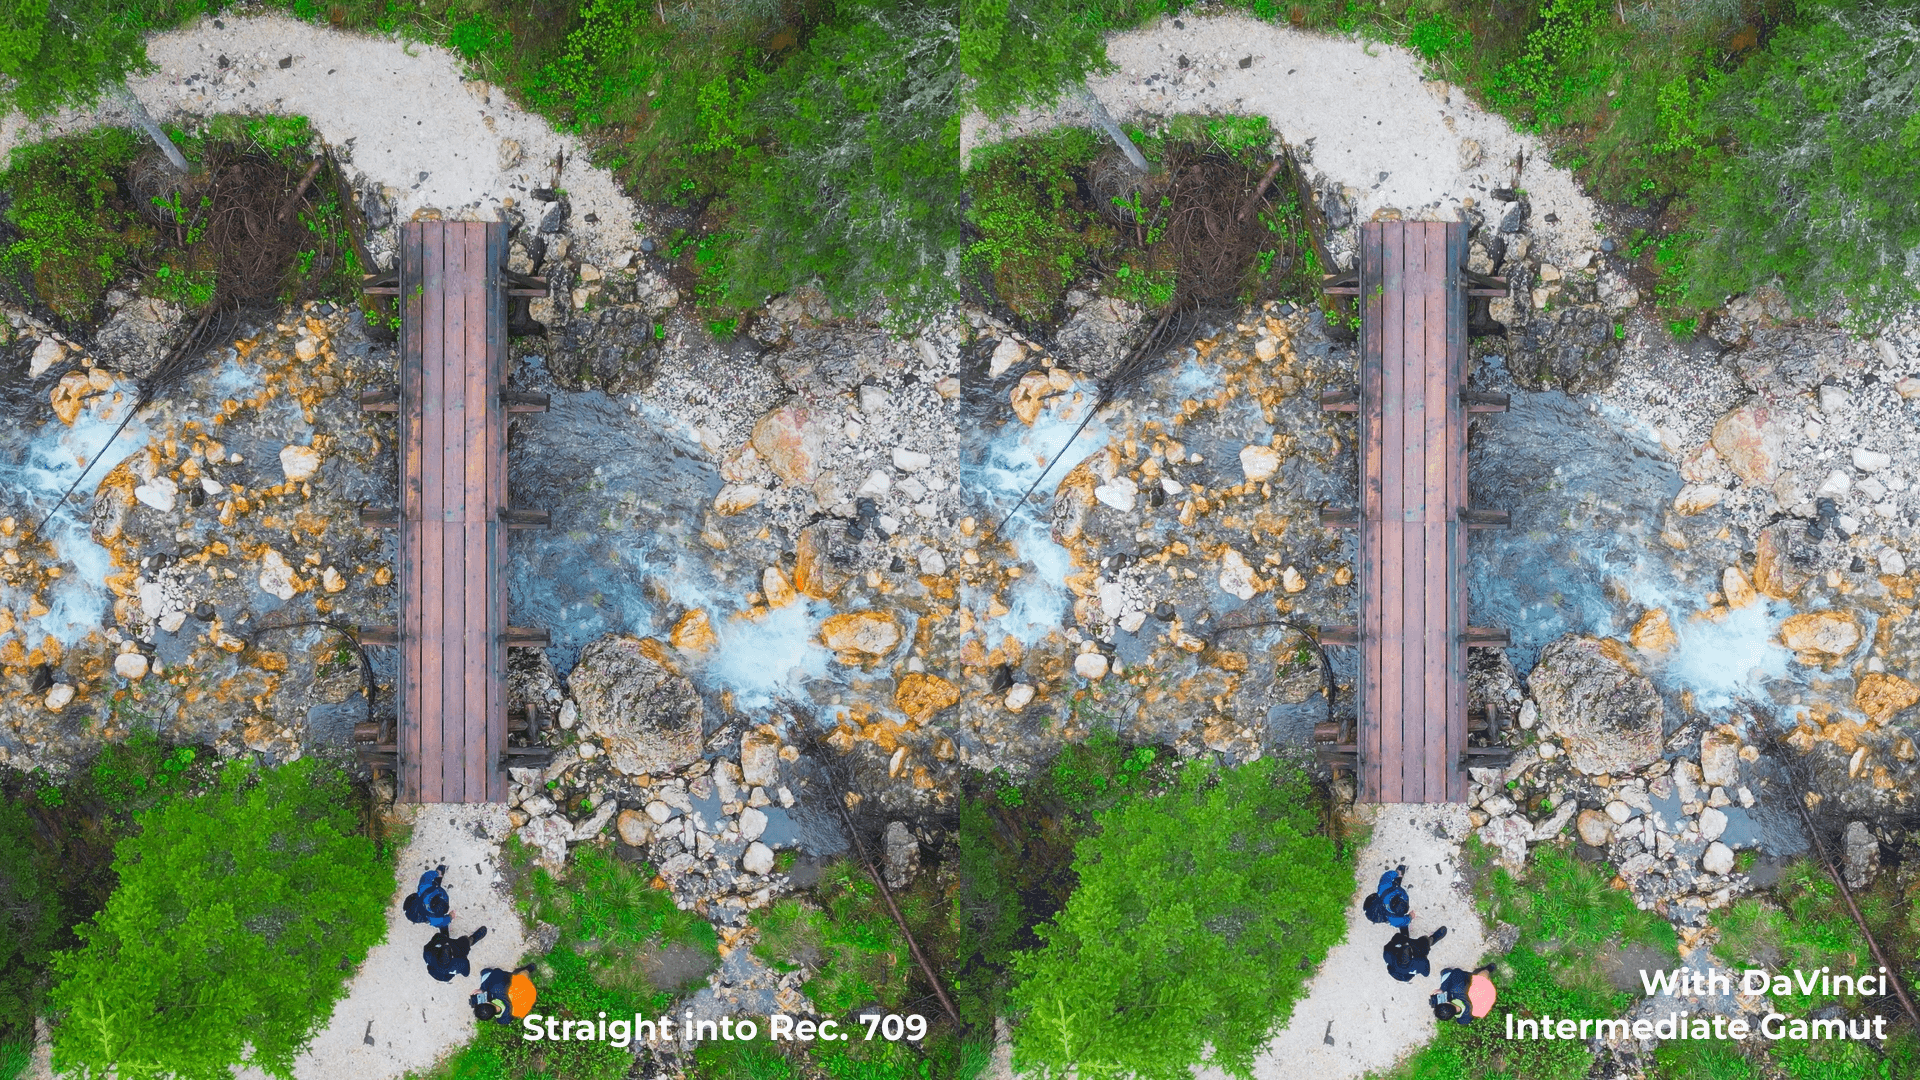
If you want to colour grade your video, it may be a good idea to take advantage of Davinci's Wide Intermediate Gamut. This gamut was specially designed to be used intermediately during the colour grading process. As you can see from below, the Davinci Wide Intermediate Gamut has a huge colour gamut. Wouldn't it be nice if we could take advantage of such a huge colour space? Well maybe we can.
All we need to do is take our footage, transform it from its camera's colour space (yes, even if it's Rec. 709) to the Davinci Wide Intermediate Gamut, do your colour grade, and then transform it from DWG to Rec. 709 for your output! This process essentially gives the video a larger colour space to work from during the colour grading process, however the video still is exported into the Rec. 709 colour space at the end! You may be thinking that there's no point in that - at the end of the day, your video is still going to be exported in Rec 709. Yes, the video will still be exported in Rec. 709, however, the adjustments you make in between will differ depending on the colour space it is in, in the intermediate step. Take a look at the example above. Both images have the exact same colour grade applied to it, however one grade is done using the Intermediate gamut, and one is not.
That's just about all I've learned about Colour Space Transforms. Once again, I am not an expert on this subject. These are just notes I have taken from my learning. If I have got something wrong, please do not hesitate to reach out on my email below!
References